ROBOTICS CLUB 2025-26
REPORT
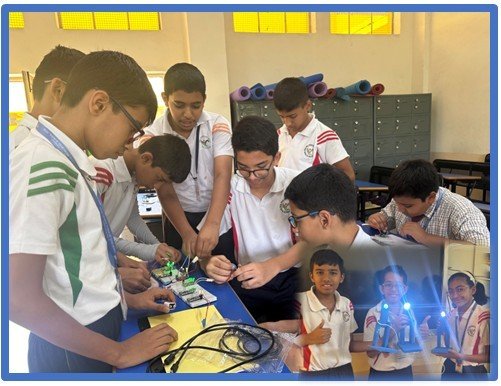
Understanding science plays a vital role in developing the thinking abilities of children and also in scoring well in exams. For that, activity-based learning is the way. TinyBots are dedicated to nurturing children to develop a natural curiosity and interest in science through a well-structured activity-based ROBOTICS workshop for Grades VI-VIII. The first activity was scheduled on 26 th April in classes of IX-C, D, and X-A. TinyBots is an initiative of ES Solutions Pvt.Ltd, who believe in making students curious about science.
Objective:
To facilitate students to understand, design and learn Robotics.
It provides interested students with opportunities to express their skills, knowledge, and creativity through conceptualizing, designing, and programming robots.
To create intelligent machines that can assist humans in a variety of ways.
Level 1 –
Activity 1: Birthday circuit card
Objective: To understand the basics of electric circuits by designing a creative greeting card that integrates an LED and a power source using copper tape.
This project aims to creatively blend electronics with design by building a robotics-themed birthday card. The card incorporates simple electronic components such as LEDs, a buzzer, and a switch or sensor to create an interactive experience. When the card is opened, it lights up —giving it a modern, tech-inspired feel suitable for a robotics workshop or DIY electronics project. The main objective was to design a creative birthday card using basic robotics and electronic principles. To introduce all the beginners to circuits and components like LEDs, buzzers, and sensors, and to explore how robotics can be applied to artistic and everyday projects
The Robotics Birthday Card project offers an exciting way to combine creativity with technology. It introduces beginners to electronics in a fun and engaging manner, while also encouraging innovation and design thinking. This project proves that robotics isn't limited to machines—it can be personal, artistic, and meaningful. It combined creativity with circuitry by making a birthday card that lights up using an LED and copper tape. They understood how circuits work and felt proud that they could now make a card that’s also a working electronic gift.
Activity 2. Rain sensor alarm
Objectives- To explore the concept of sensors and understand how rainwater can act as a medium to close an electrical circuit and activate a rain alarm system This project focuses on building a Rain Sensor Alarm system using basic robotics and electronics components. The rain sensor detects water droplets and activates an alarm, alerting the user of rain. Such systems are highly useful in robotics and smart automation, especially for weather monitoring robots, automatic window-closing systems, and agriculture applications. The main objective is to design a simple rain detection system using a rain sensor module. The rain sensor module consists of a rain-sensing plate and a
comparator board. When raindrops fall on the sensor plate, its resistance changes, producing an analog or digital output.The Rain Sensor Alarm is a practical and educational robotics project. They created a rain alarm using foil and a buzzer. They also discovered how water can close a circuit and turn on the buzzer. They felt excited to use this idea to detect rain at home.
Level 2-
Activity 1: Light-dependent resistor (LDR)
Objective-To understand the working principle of a Light sensor (LDR) and how it can be used to control an LED in a light-sensitive circuit.
In the field of robotics, sensors play a crucial role in enabling machines to interact with their environment. One such sensor is the Light Dependent Resistor (LDR). This component helps robots detect changes in light intensity and make decisions based on it, such as following a light source, avoiding light, or turning on systems when it’s dark. An LDR (Light Dependent Resistor), also known as a photo resistor, is a light-sensitive component whose resistance decreases as the intensity of light increases. It is commonly used in light-sensing circuits.
It has high resistance in darkness (can be in mega ohms), non-polarized, meaning it can be connected in any direction. LDRs are simple yet powerful tools for robotics. They allow robots to sense and react to light, making them essential for building intelligent systems. By using LDRs, robotic systems can mimic real-world behaviour like turning on lights at night or following light sources. Students built a circuit that lights up when light falls on it. They understood how sensors like LDR work and related it to the auto-brightness feature in their mobile phone. It was fun seeing how light can control a device.
Activity 2: USB Study lamp
Objective-To understand how USB ports supply power and how to build a parallel LED circuit that utilizes USB power as a real-world energy source.
A study lamp is a focused light source used to provide proper illumination while reading, writing, or studying. It helps to reduce eye strain and improves concentration by offering a well-lit workspace.
The key features of a Study Lamp are adjustable brightness, energy efficiency, as it often uses LEDs, and is portable because it is foldable as well, and rechargeable.
Children connected the LED and resistor in series. They fixed the LED at the top of the stand and used tape to secure the wire neatly along the structure.
Making a study lamp was a fun and educational DIY project. It introduced students to basic electronics (like LEDs, resistors, and switches) and helped them build something useful for daily life. With small modifications, it can be integrated into robotics or smart home projects too. Students learned how USB provides electricity and how to connect LEDs safely in parallel. They were happy to use this lamp
while studying at night.
Level 3-
Activity 1: Circuit implementation on Breadboard
Objective-To learn how to build and test basic electronic circuits on a breadboard using components like LEDs, resistors, and jumper wires
A hands-on workshop was conducted to provide students with practical knowledge of building electronic circuits using a breadboard—a vital skill in the field of robotics. The objective was to familiarize participants with basic circuit components and help them understand how to assemble and test circuits without soldering. The primary goal of this workshop was to: Introduce the breadboard and its layout, to demonstrate the use of electronic components like resistors, LEDs, ICs, and jumper wires and guide students through creating a simple circuit relevant to robotics (e.g., LED blinking or motor control)
Students were first introduced to the structure and working of a breadboard, including: Power rails and terminal strips, the central dividing gap for ICs, and the concept of row and column connectivity. Students inserted the component leads into the appropriate breadboard holes. Care was taken to place ICs across the central gap and ensure correct orientation using the notch or dot as a guide. By the end
of the session, students successfully implemented basic circuits on the breadboard. They gained confidence in using jumper wires and understanding breadboard connectivity
The breadboard workshop served as an effective, engaging introduction to circuit building and design. It laid the groundwork for more advanced robotic applications, enabling students to prototype and test their ideas efficiently and safely. Students learned how to troubleshoot when the LEDs didn't glow and felt confident in using a breadboard for future projects.
Activity 2: Arduino-based LED blinking/sequence
Objective-To introduce students to Arduino programming and hardware by creating a simple program to blink multiple LEDs using digital output pins As part of a hands-on robotics workshop, participants learned how to program an Arduino microcontroller to control LEDs. This session introduced the basics of microcontroller programming, circuit building, and automation concepts—fundamentals for any robotics project.
The primary goals of this workshop activity were to introduce the Arduino platform and IDE and guide participants in creating an LED blinking and sequencing circuit. The session began with a brief explanation of: What an Arduino is, its role in robotics, and the key components on the board.
Students modified the code to change patterns, timings, or even reverse the sequence to better understand loops, arrays, and delays in Arduino programming. All participants successfully built and programmed their LED circuits. They learned how to use Arduino for controlling hardware and understood how such logic can be extended to sensors, motors, and robots. It built a strong foundation
for future robotics applications, where similar logic is applied to more complex components like sensors, motors, and actuators. Children understood how coding can control hardware and felt excited seeing the code work on a real circuit.
Report by – Ms Neelam Bhosale
Mr Tejas Kulkarni